Introduction
Script Evolution is meant to be easy to use, and most of its features are supposed to be self-discoverable. This page will show you the main pages and functions to help you get started.
Note that the application is free to download and shipped with 1 credit to let you explore its features. We recommend to first use it on a short film to gain some experience before using it on a feature film or a serie.
Complete courses are available from third-party trainers. See Julie Collet’s YouTube training channel for more or contact us
Table of Contents
General layout
Script Evolution layout consists of a main page in the center, and a menu bar on the left containing access to the various entities of the application.
The top right part of the app contains links to the app’s modules (reporting, photo, lining, etc). Some modules are only available from certain screens (whenever that makes sense), and their content depends on the main window, which defines the scope for the module.
Script Evolution is designed to work in either landscape or portrait mode, as well as split mode (for cases you need to have another app running at the same time).
Left menu
The left menu lets you quickly reach any part of your project, and is decomposed into 4 sections :
- project-level links (black): project home (contains backup button) and script documents
- event (blue): day, shot, take
- script elements (green) : scenes, characters, …
- technical elements (red): camera, memory card, special equipment, …
Left menu also sometimes contains shortcut on the top to create or sort items in the list. Items than contain other items (such as days and shots) also shows an arrow on which you can press to see the nested elements, without having to update the main window.
Main window
Whenever you click on an item from the menu, the main part of the app is updated to show the content of the item you clicked on. Those screens are usually intuitive, but let’s see the most important ones:
Scene
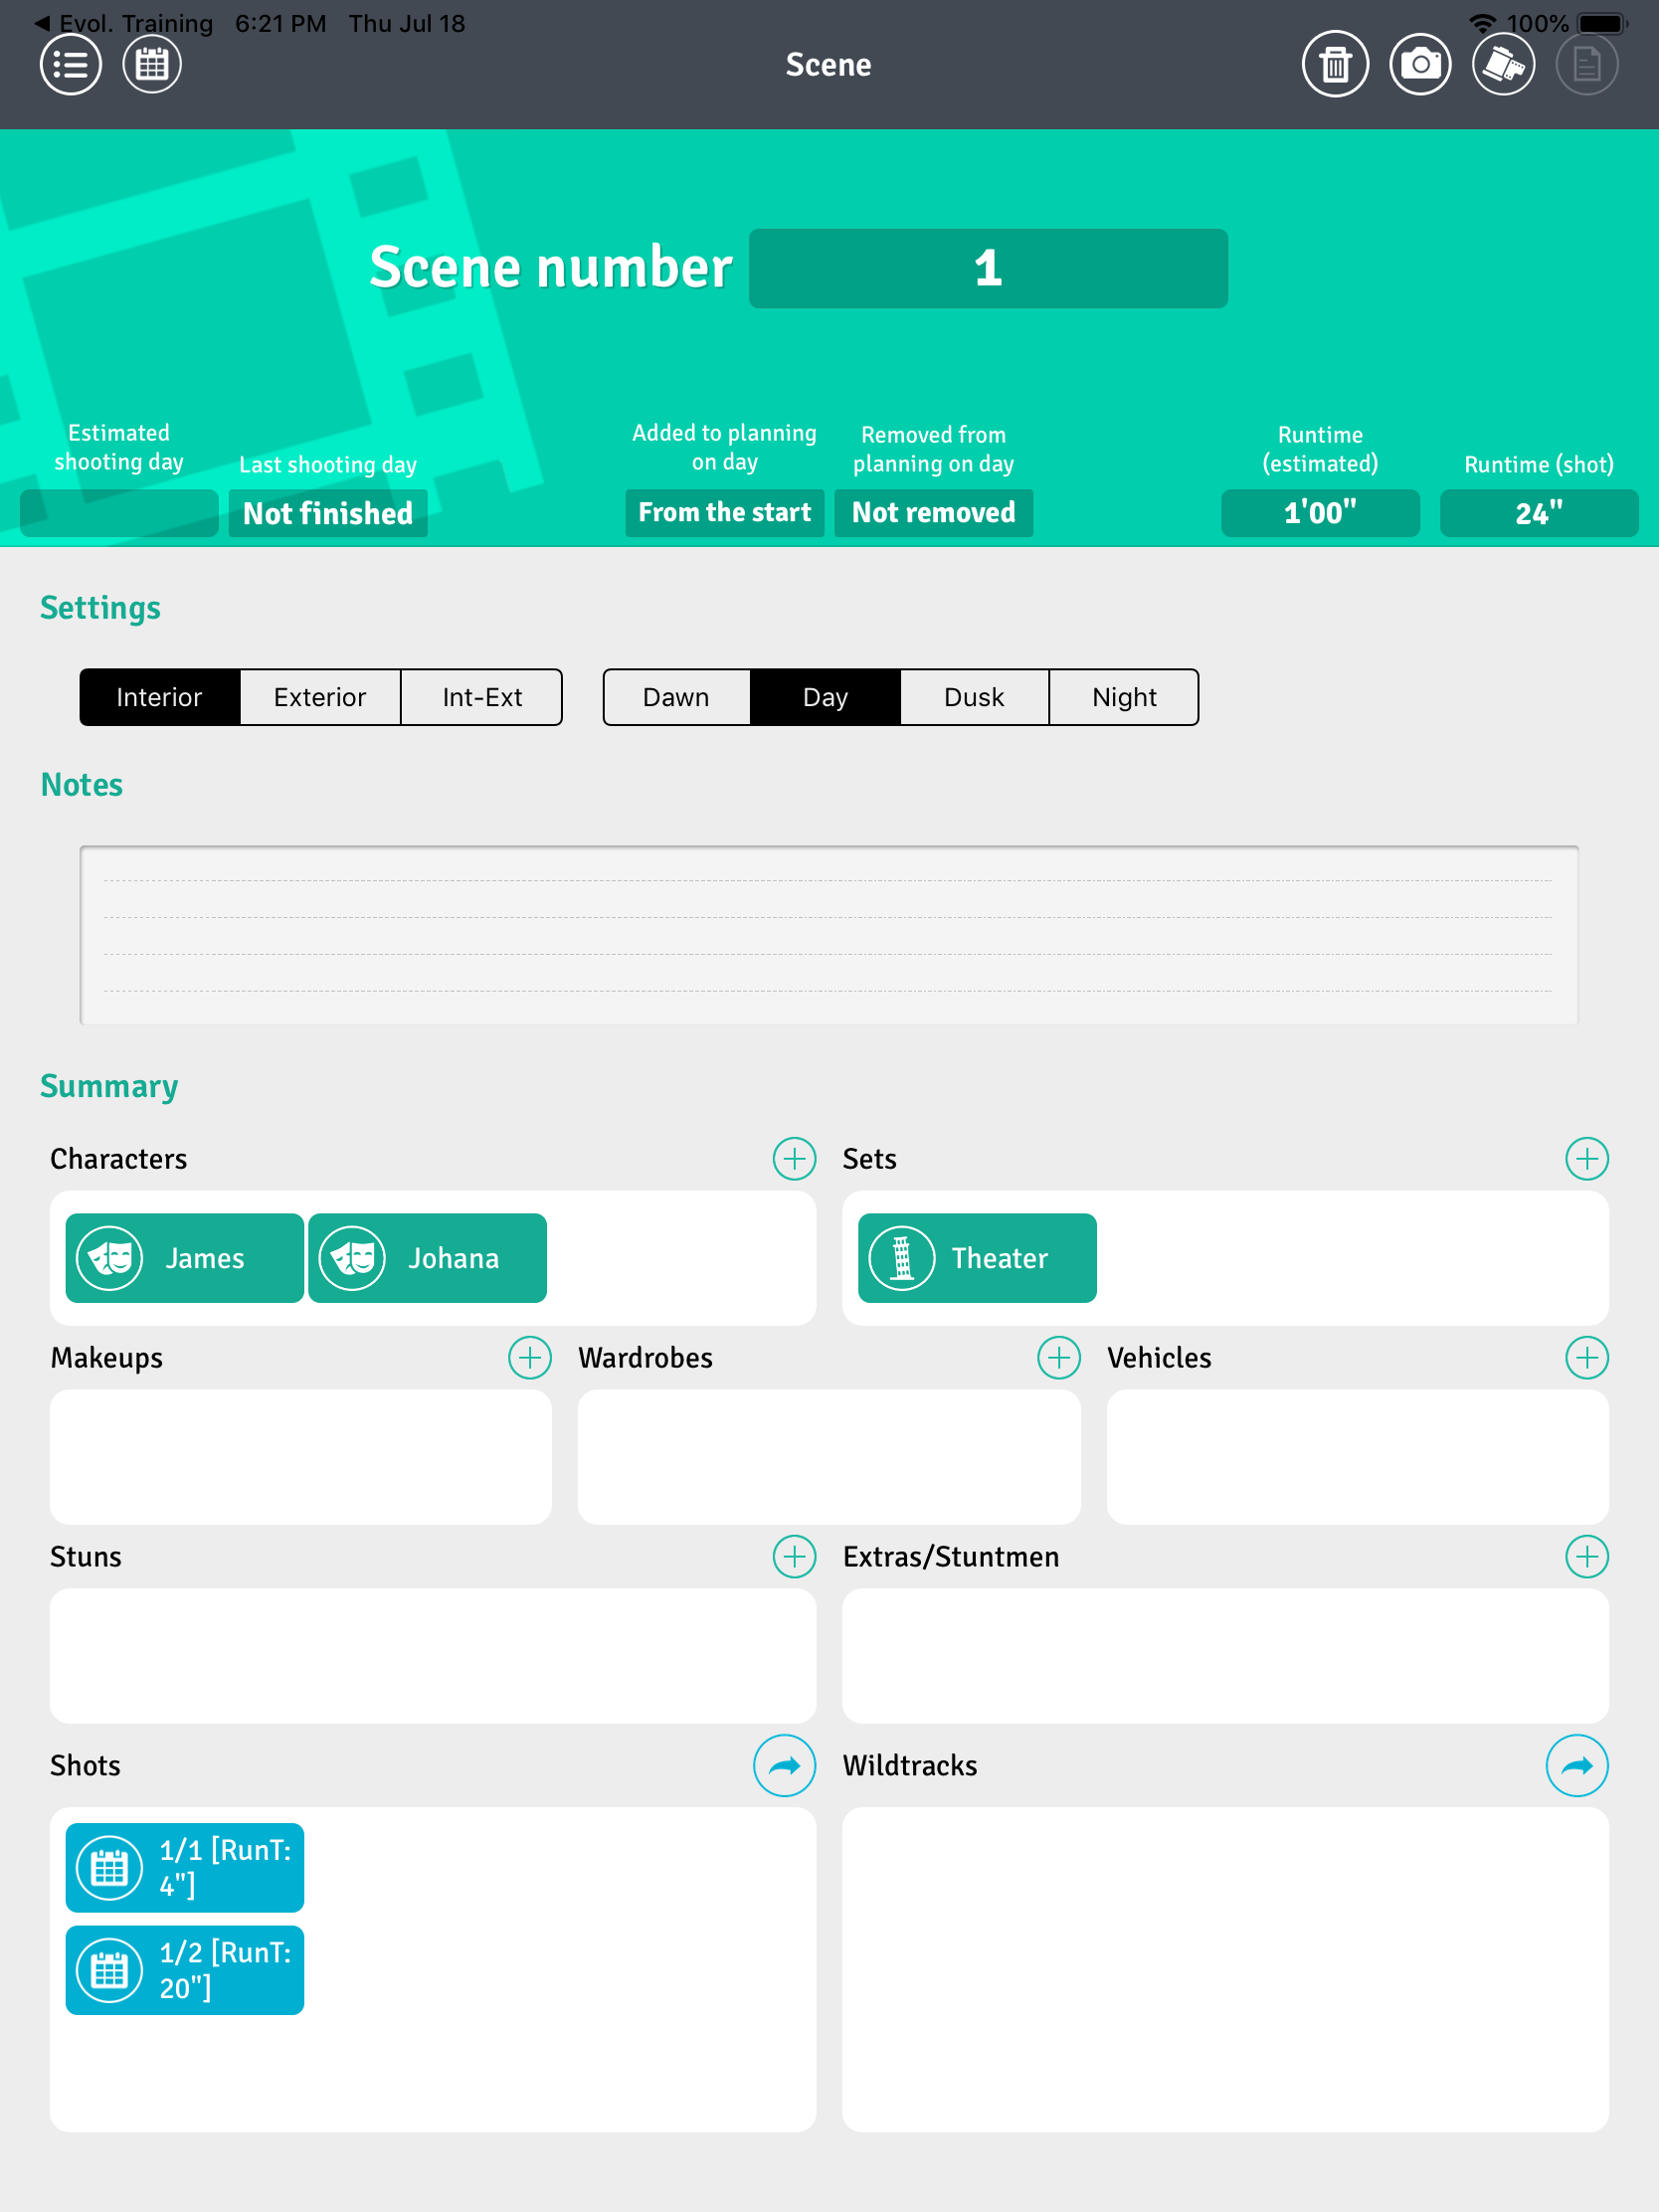
Scene contains all the entities associated to a given scene. In order to link a given element to a scene tap on the “+” sign in the section then pick the item(s) in the list.
For a scene to be marked as completed in the reports you need to pick the day at which it was considered completed in the “Last shooting day” field.
Scene duration is currently expressed as estimated on-screen time rather than “script inches” (corresponding to an eighth of a page). We believe it is a better progress indicator in general, but are aware that many international productions work with inches. Depending on user interest, we may add support for that format in a new release. Let us know !
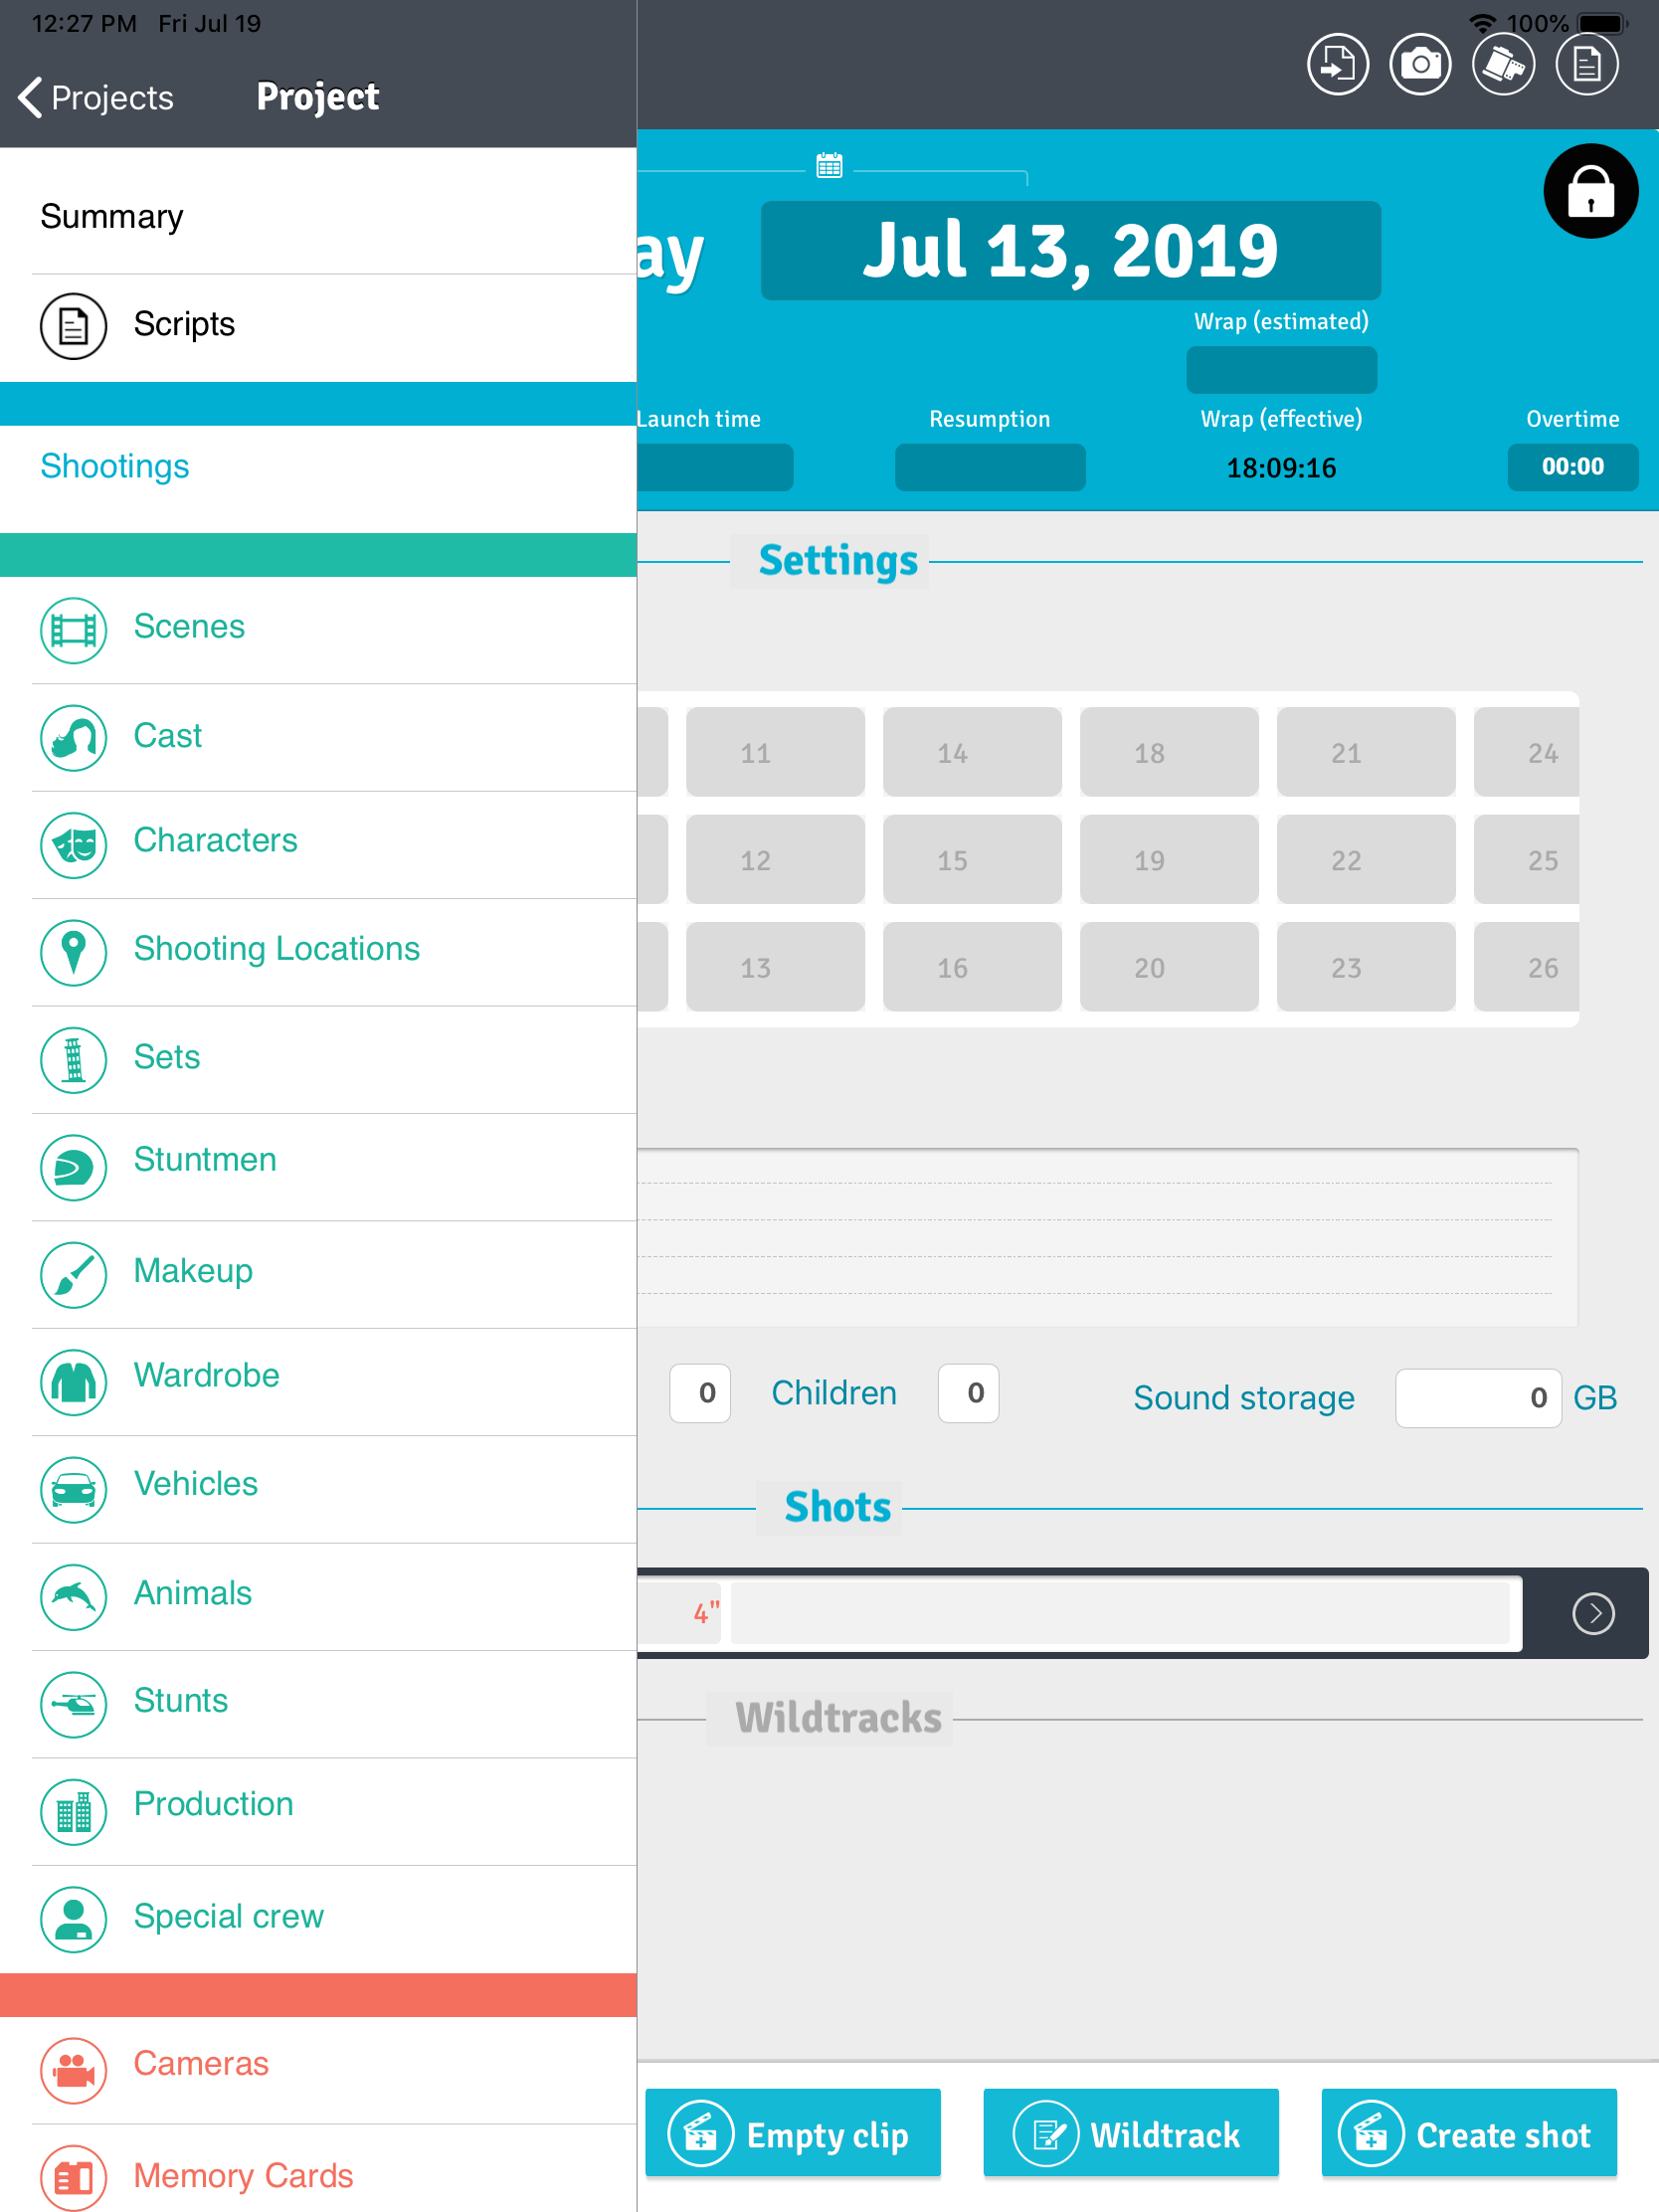
Day
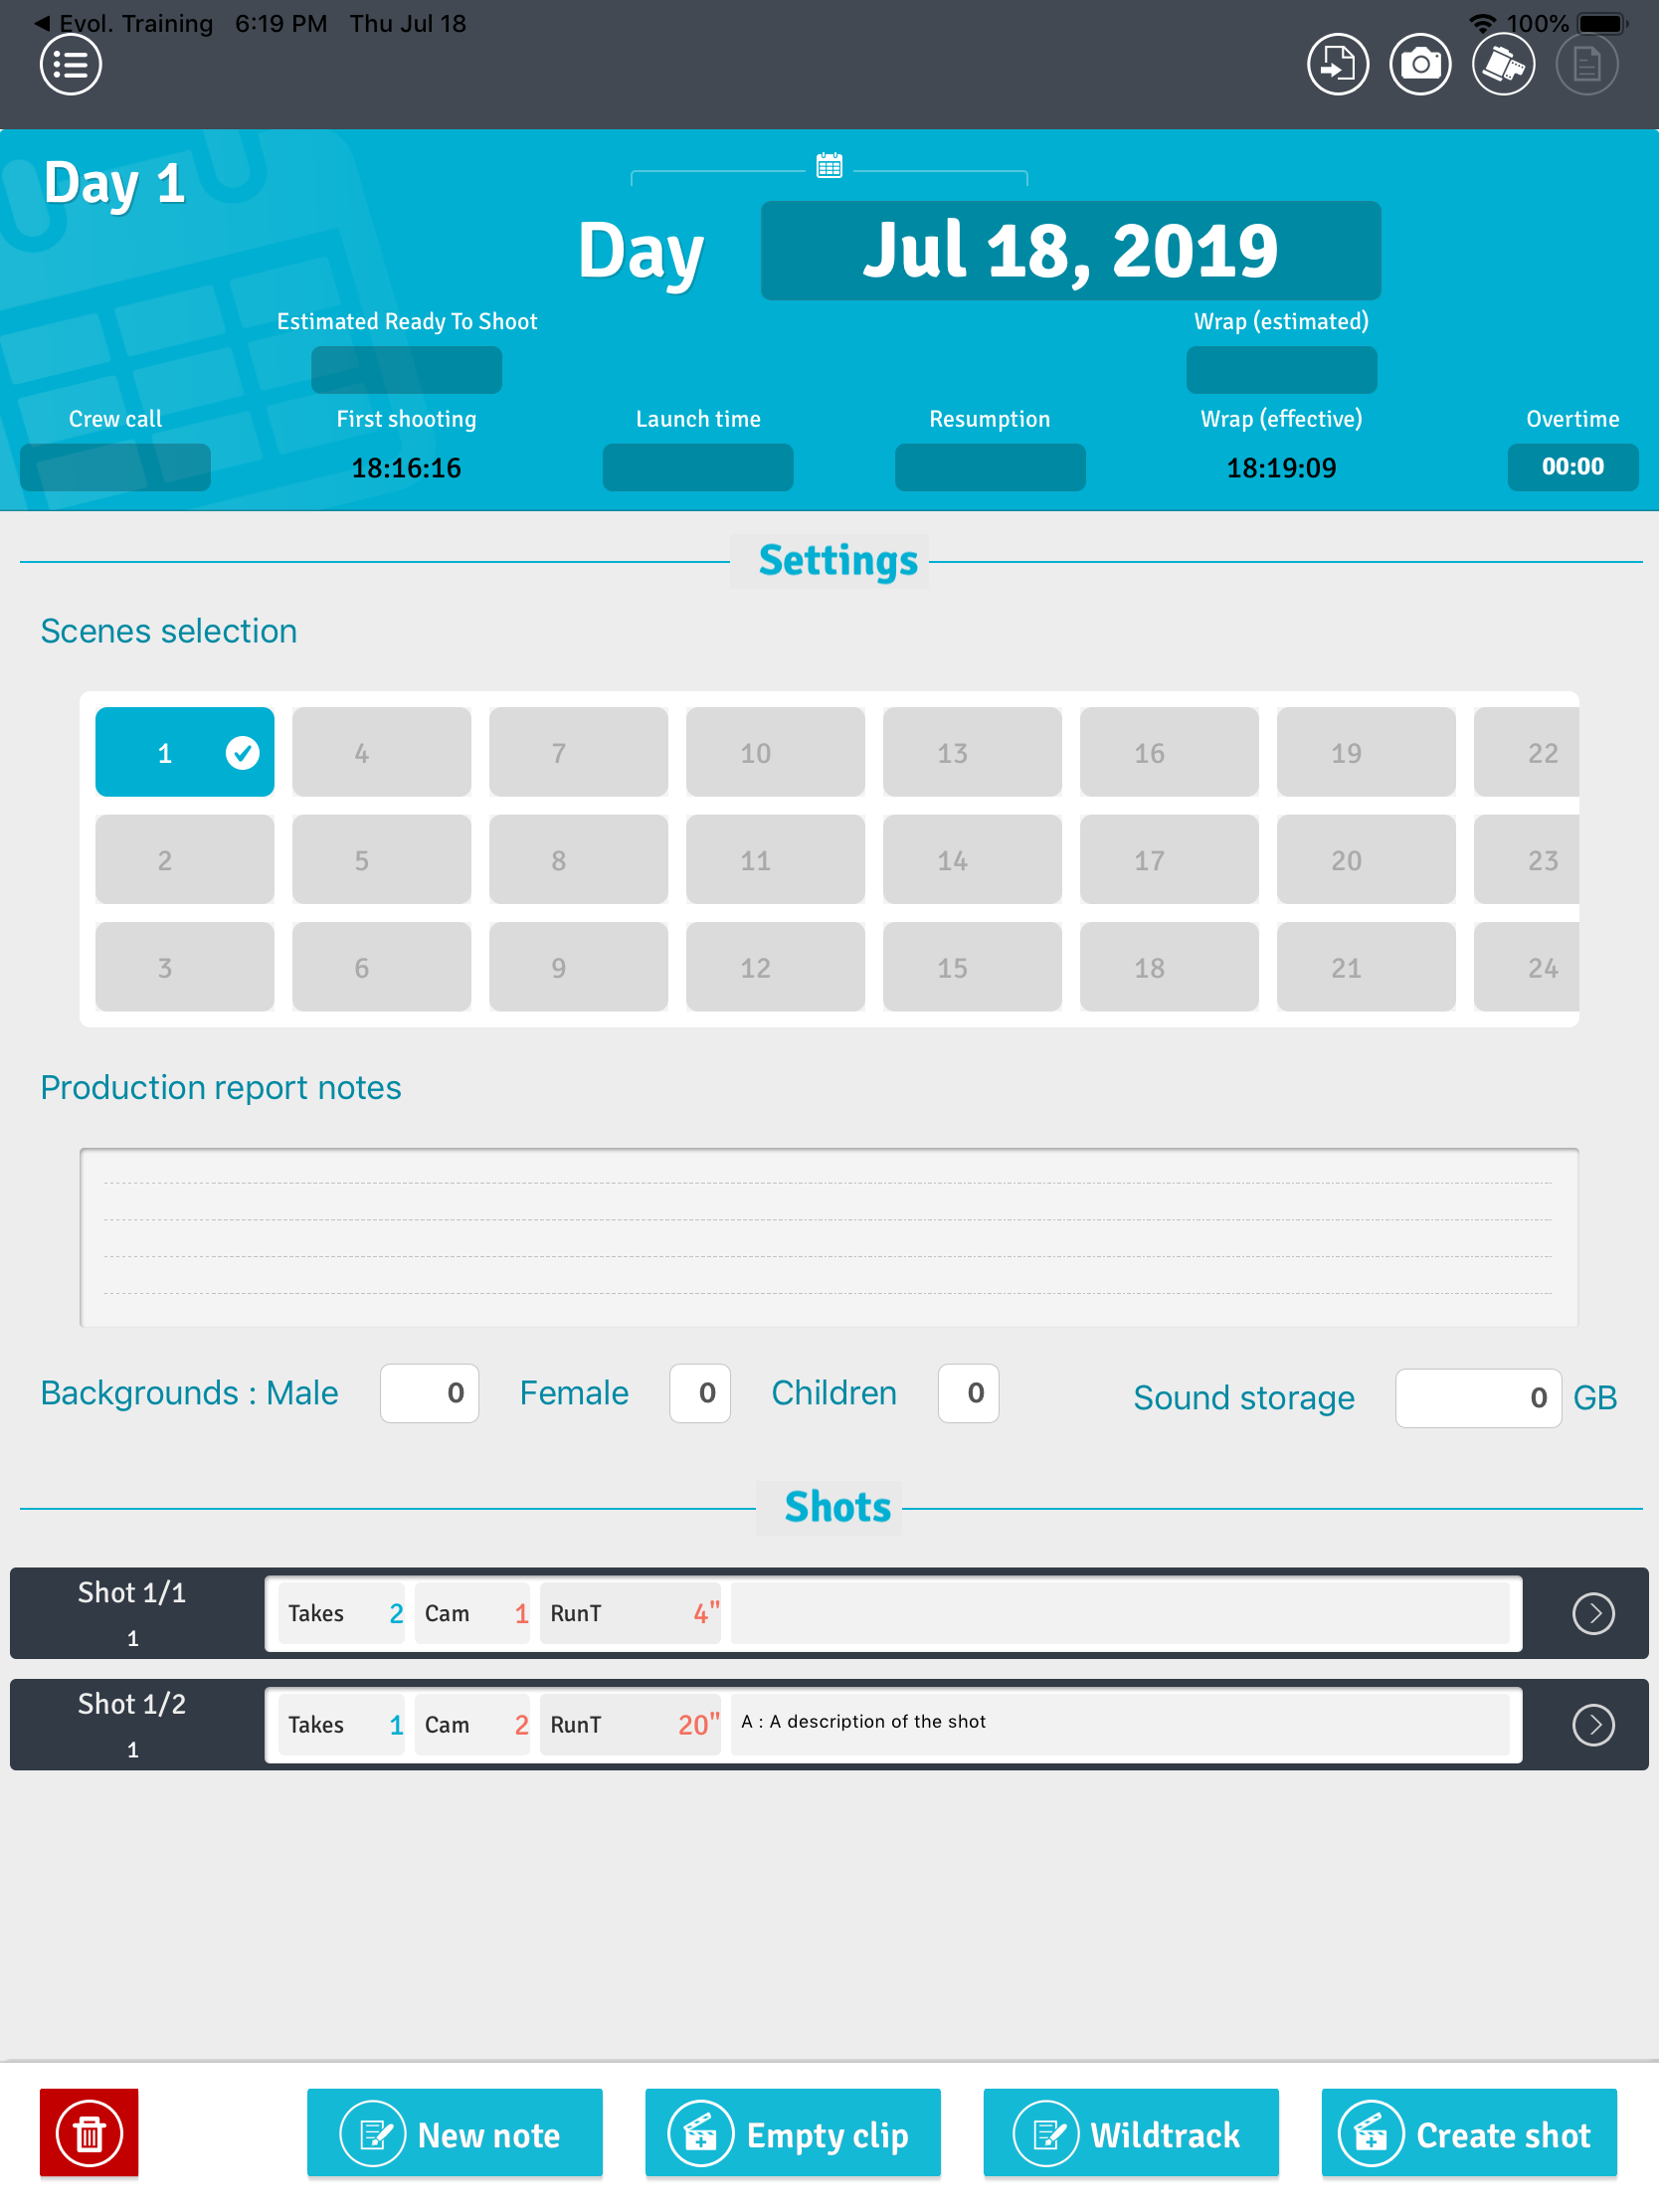
The shooting day screen has multiple sections: “Settings”, “Shots”, “WildTracks”, ec. Each section can be collapsed or opened by tapping on its title.
On the top right of the day screen is the button to access the report module. From there you’ll be able to generate and export all the reports for the day.
Note : you need to select the scenes in the day screen before you can see them in the shot screen.
Shot
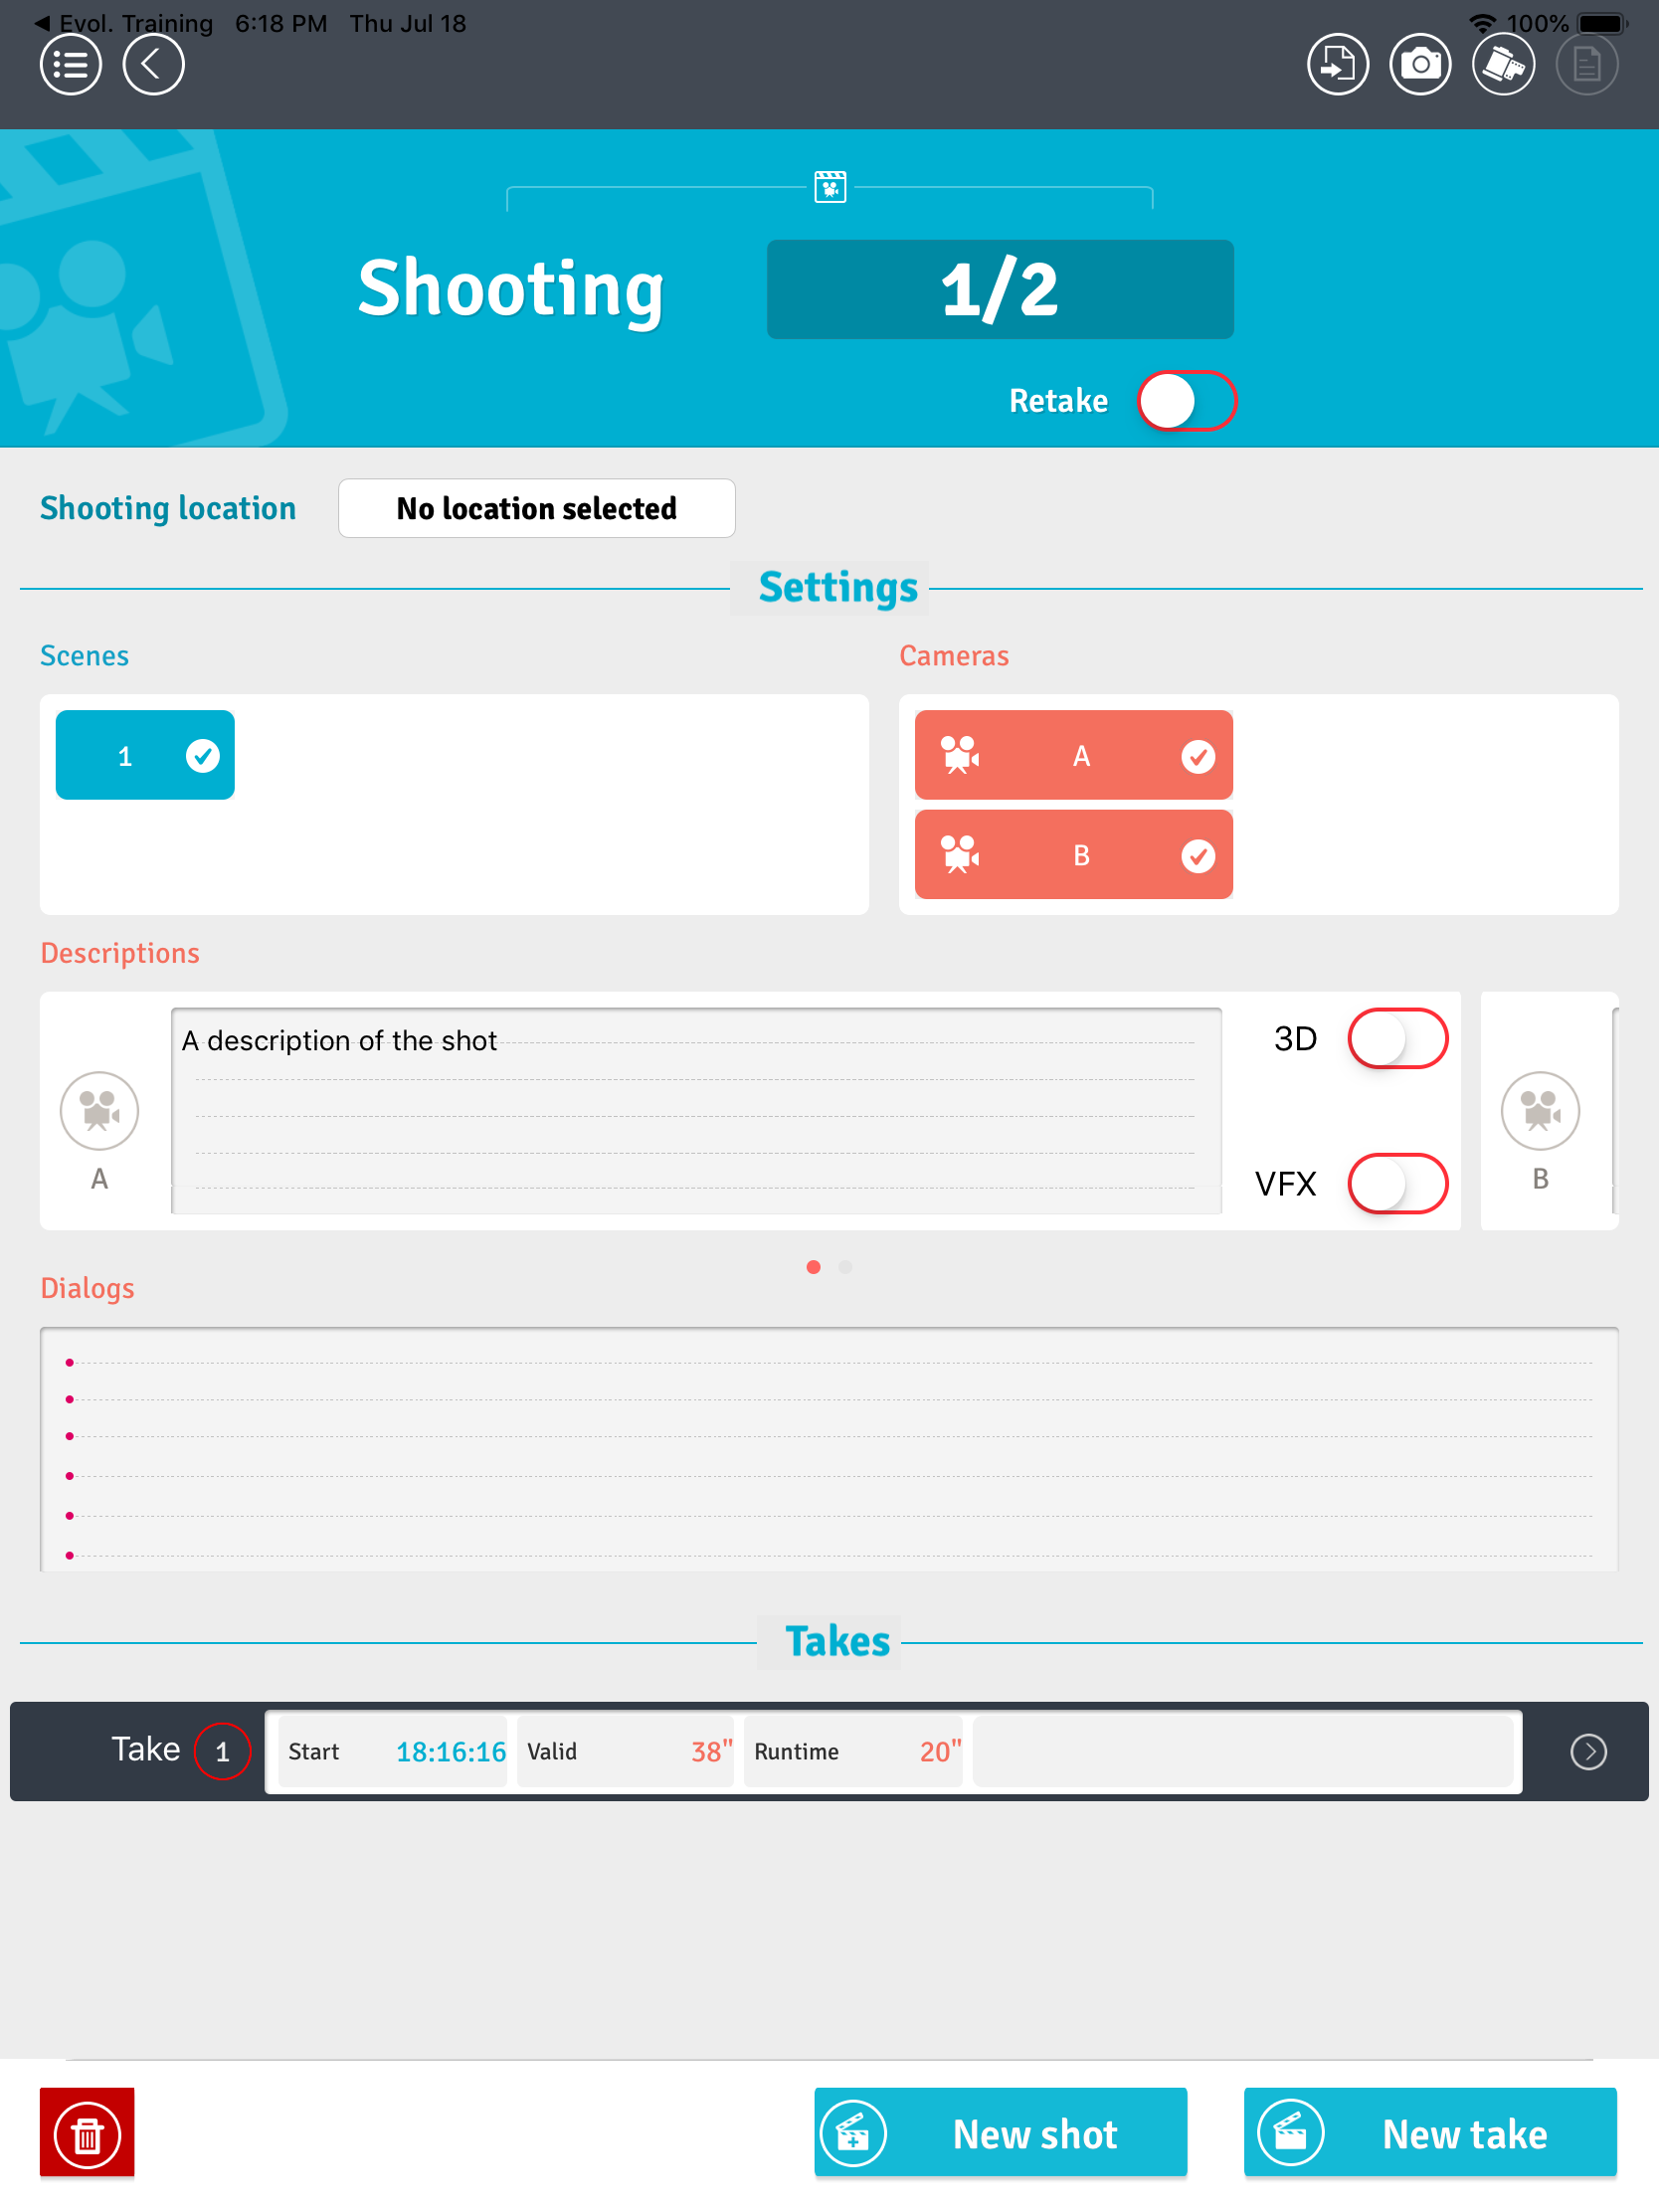
Shots shows the setting for the shot as well as all the takes. Tapping on a take brings you to the take screen.
Take
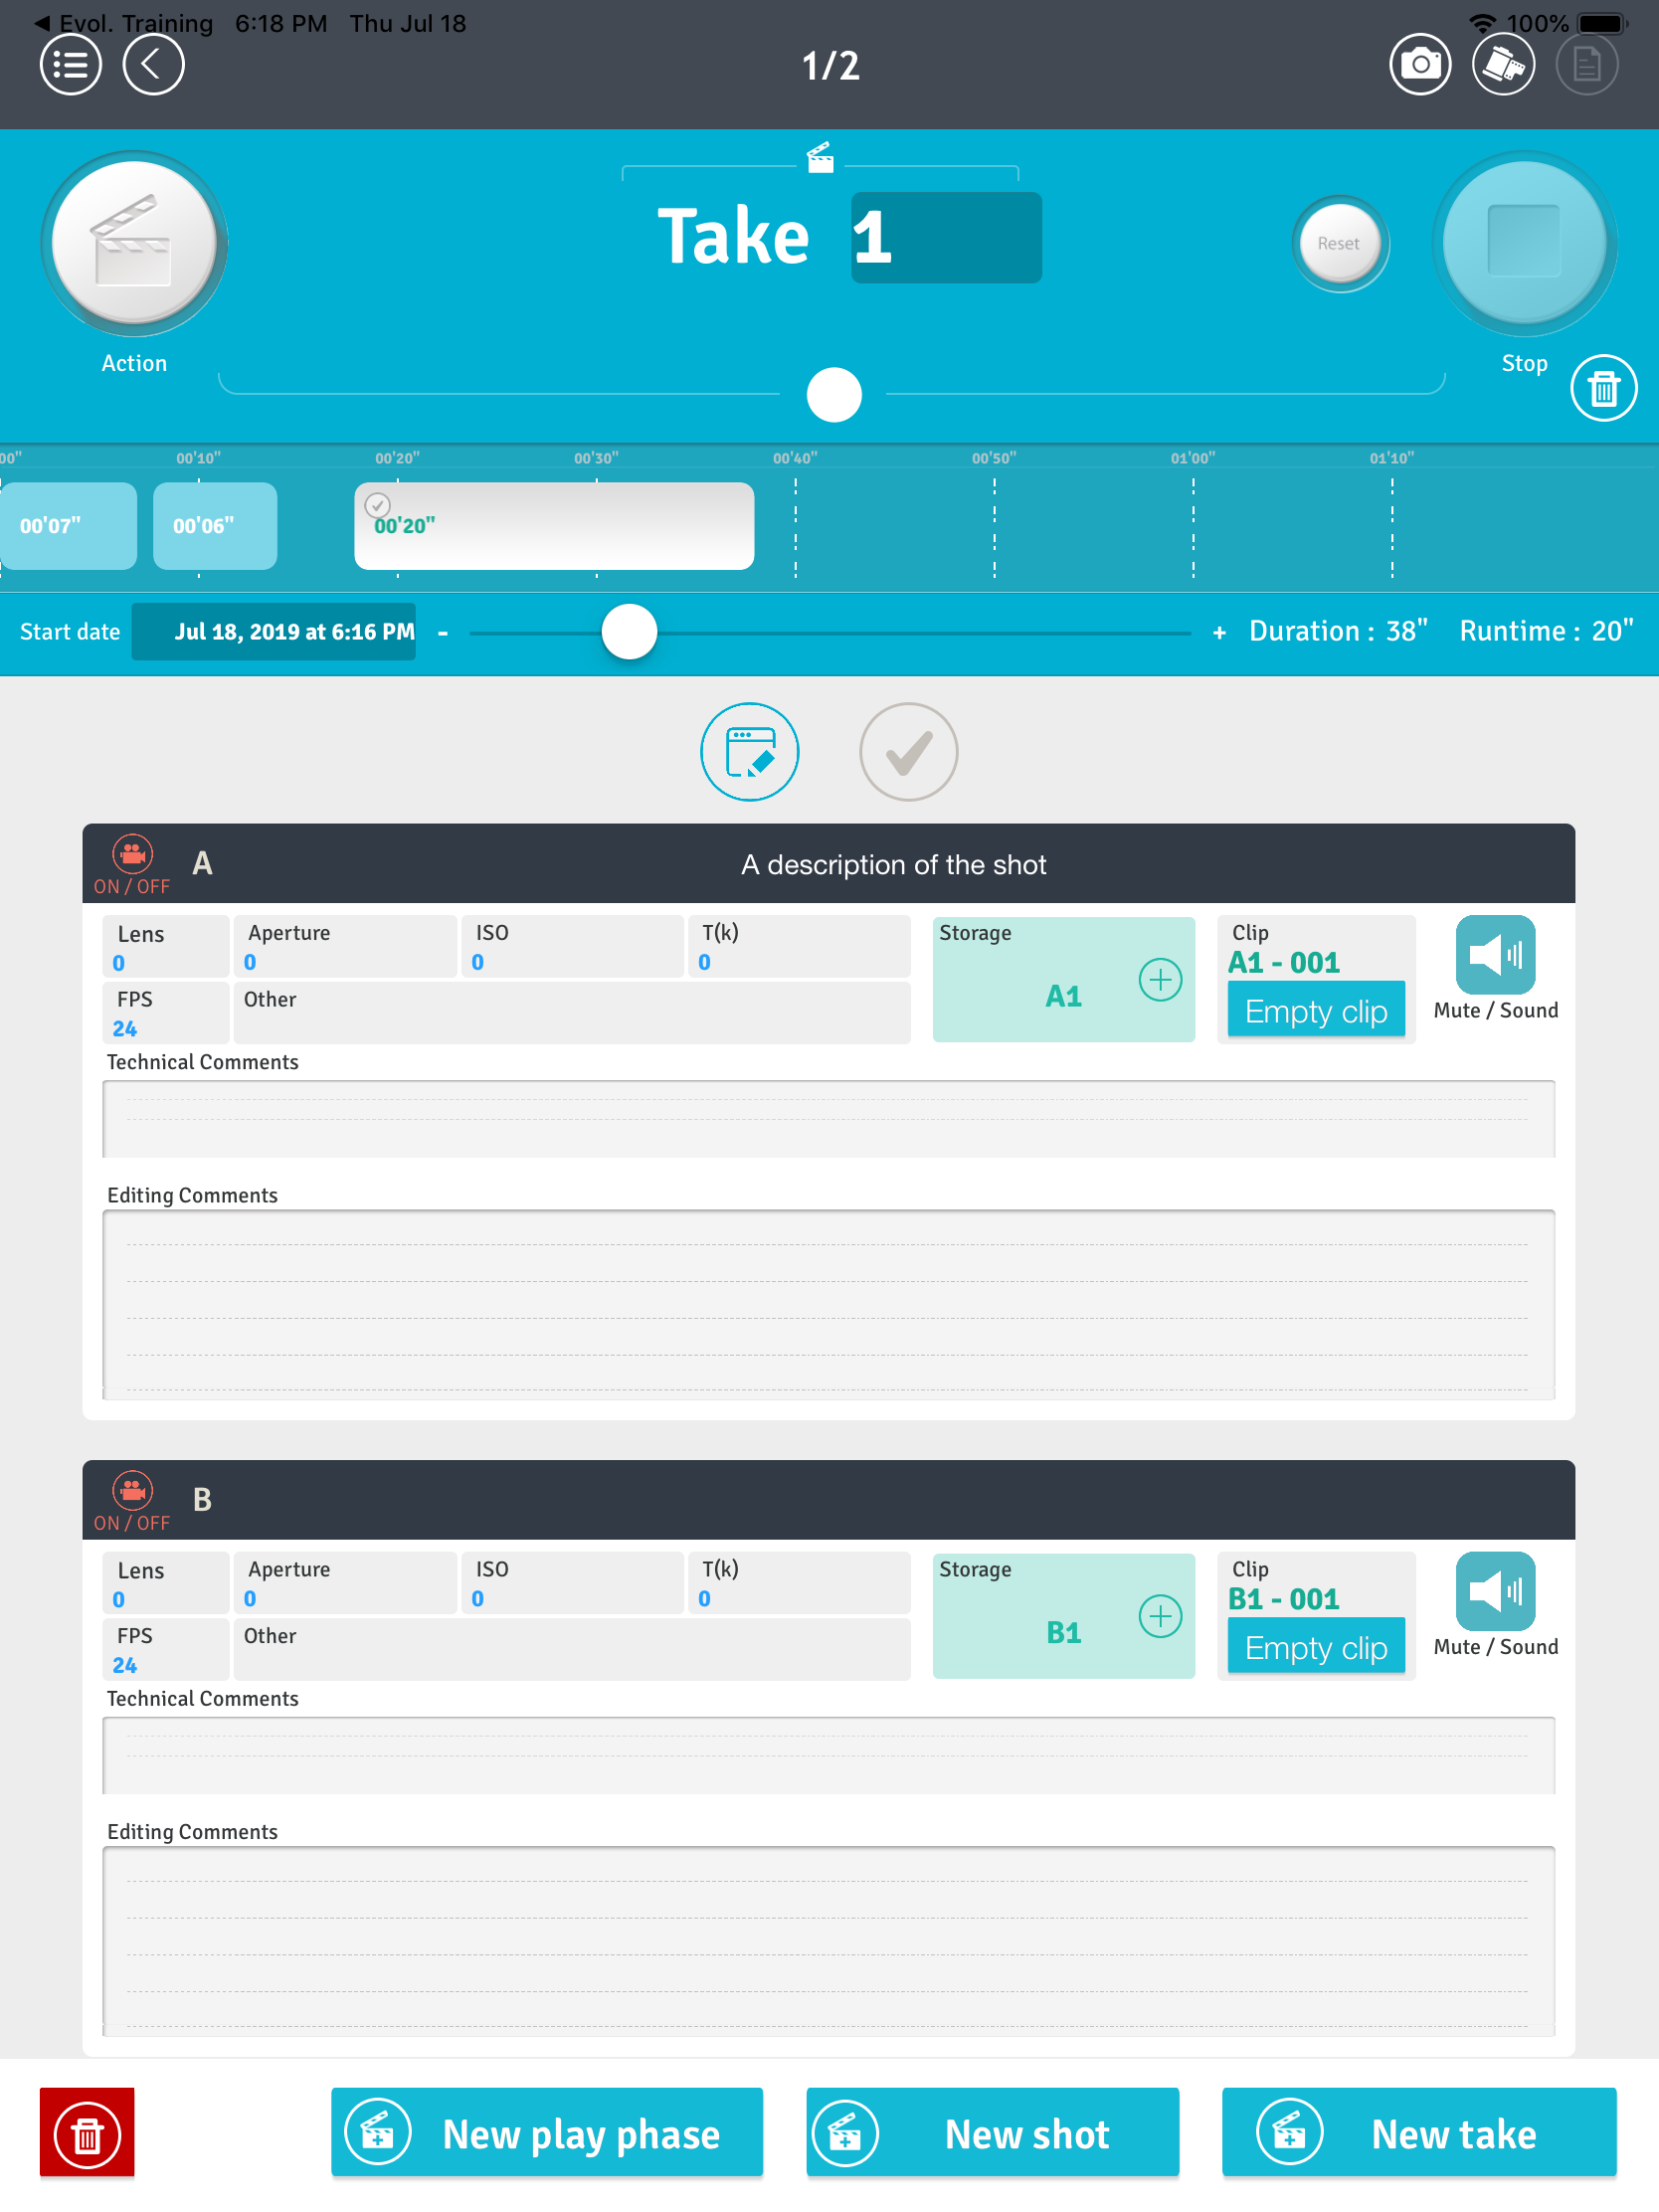
The Take screen lets you record the time a take took by pressing on the start / stop button, as well as fill all the information for the editor. A take is decomposed into play phases (materialized as rectangles in the timeline). A phase can be in three different states:
- invalid (light blue): the take is invalid and the duration of the phase isn’t taken into account.
- valid (white): the take is considered valid (a circle will appear), but the time isn’t added
- valid & counted (white with a checkmark): the take is valid and the duration of the phase is added to the useful duration for the take. A valid take is shown with a red circle in the reports and throughout the app.
You can change the state of a phase by tapping on it.
If you need finer control over the time assignment between scenes (such as assign the time to only some of the sequence), just tap the checkmark button in the upper-middle of the screen. The screen will then look like this:
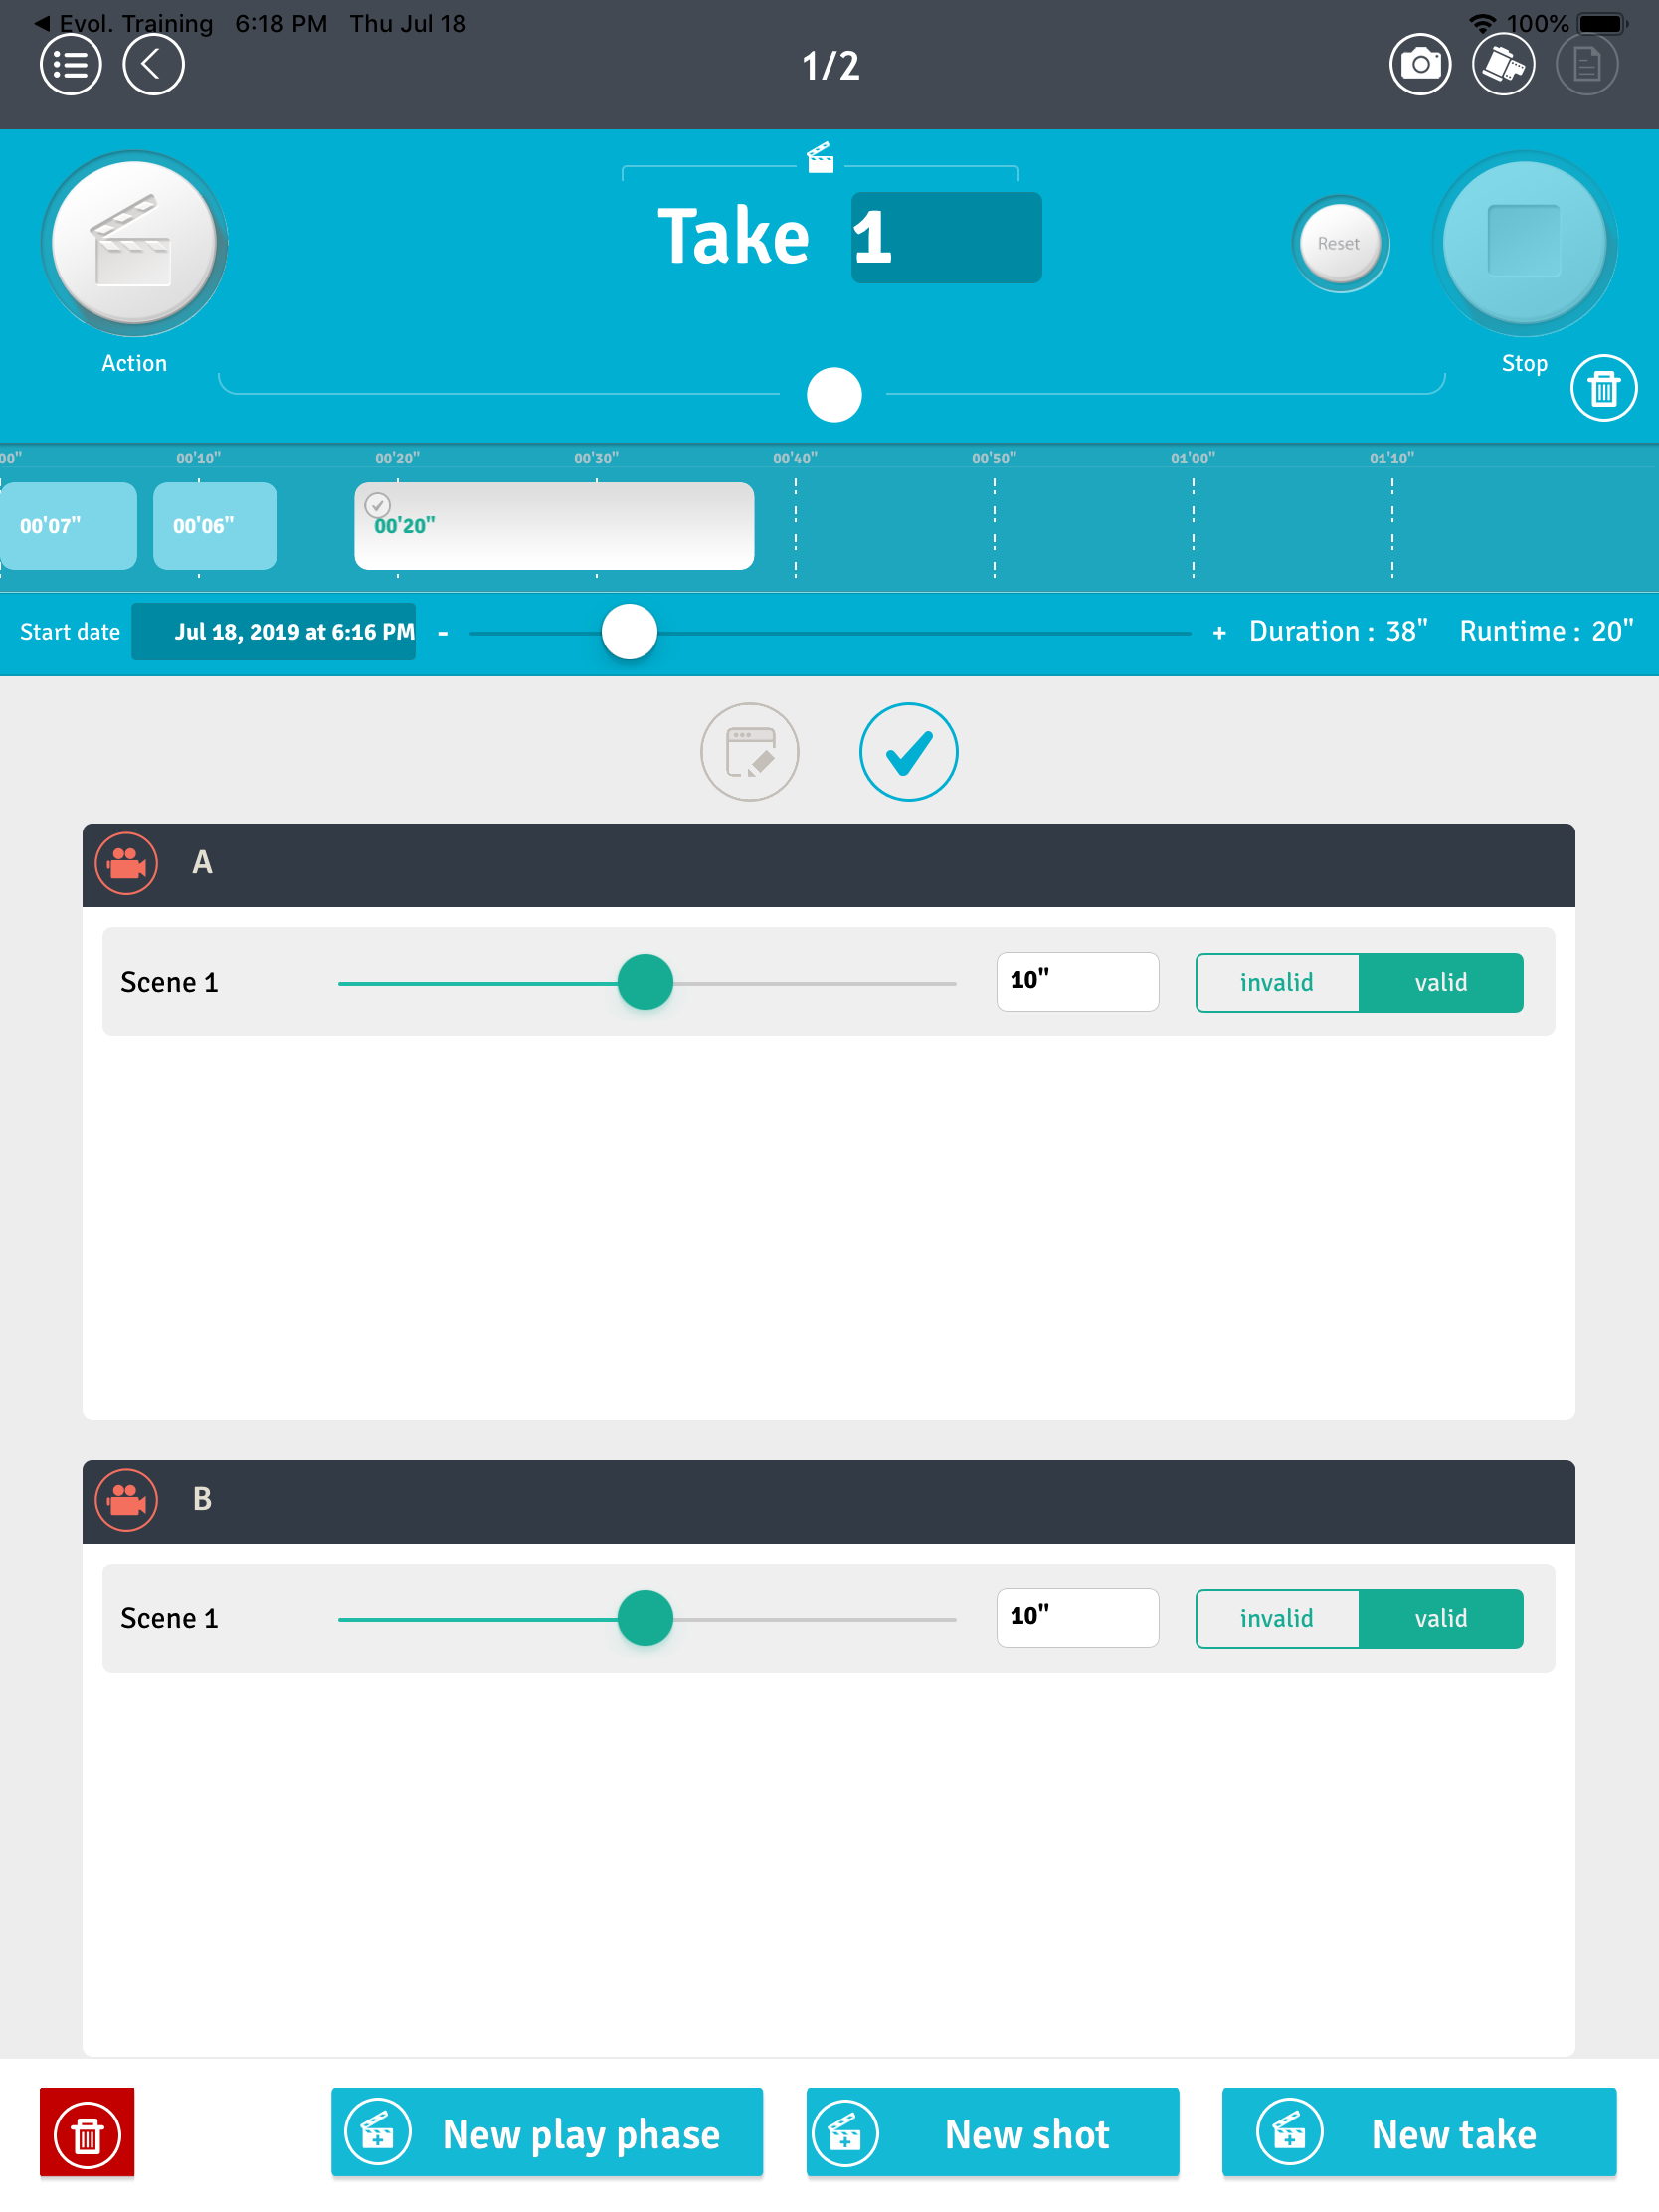
From there, simply drag the sliders or type the times for each sequence / camera.
You can always add new phases to a take by tapping the “new play phase” button at the bottom, and remove phases by tapping on the small trash icon under the “stop” button, then on the phase you want to remove.
Modules
Report module
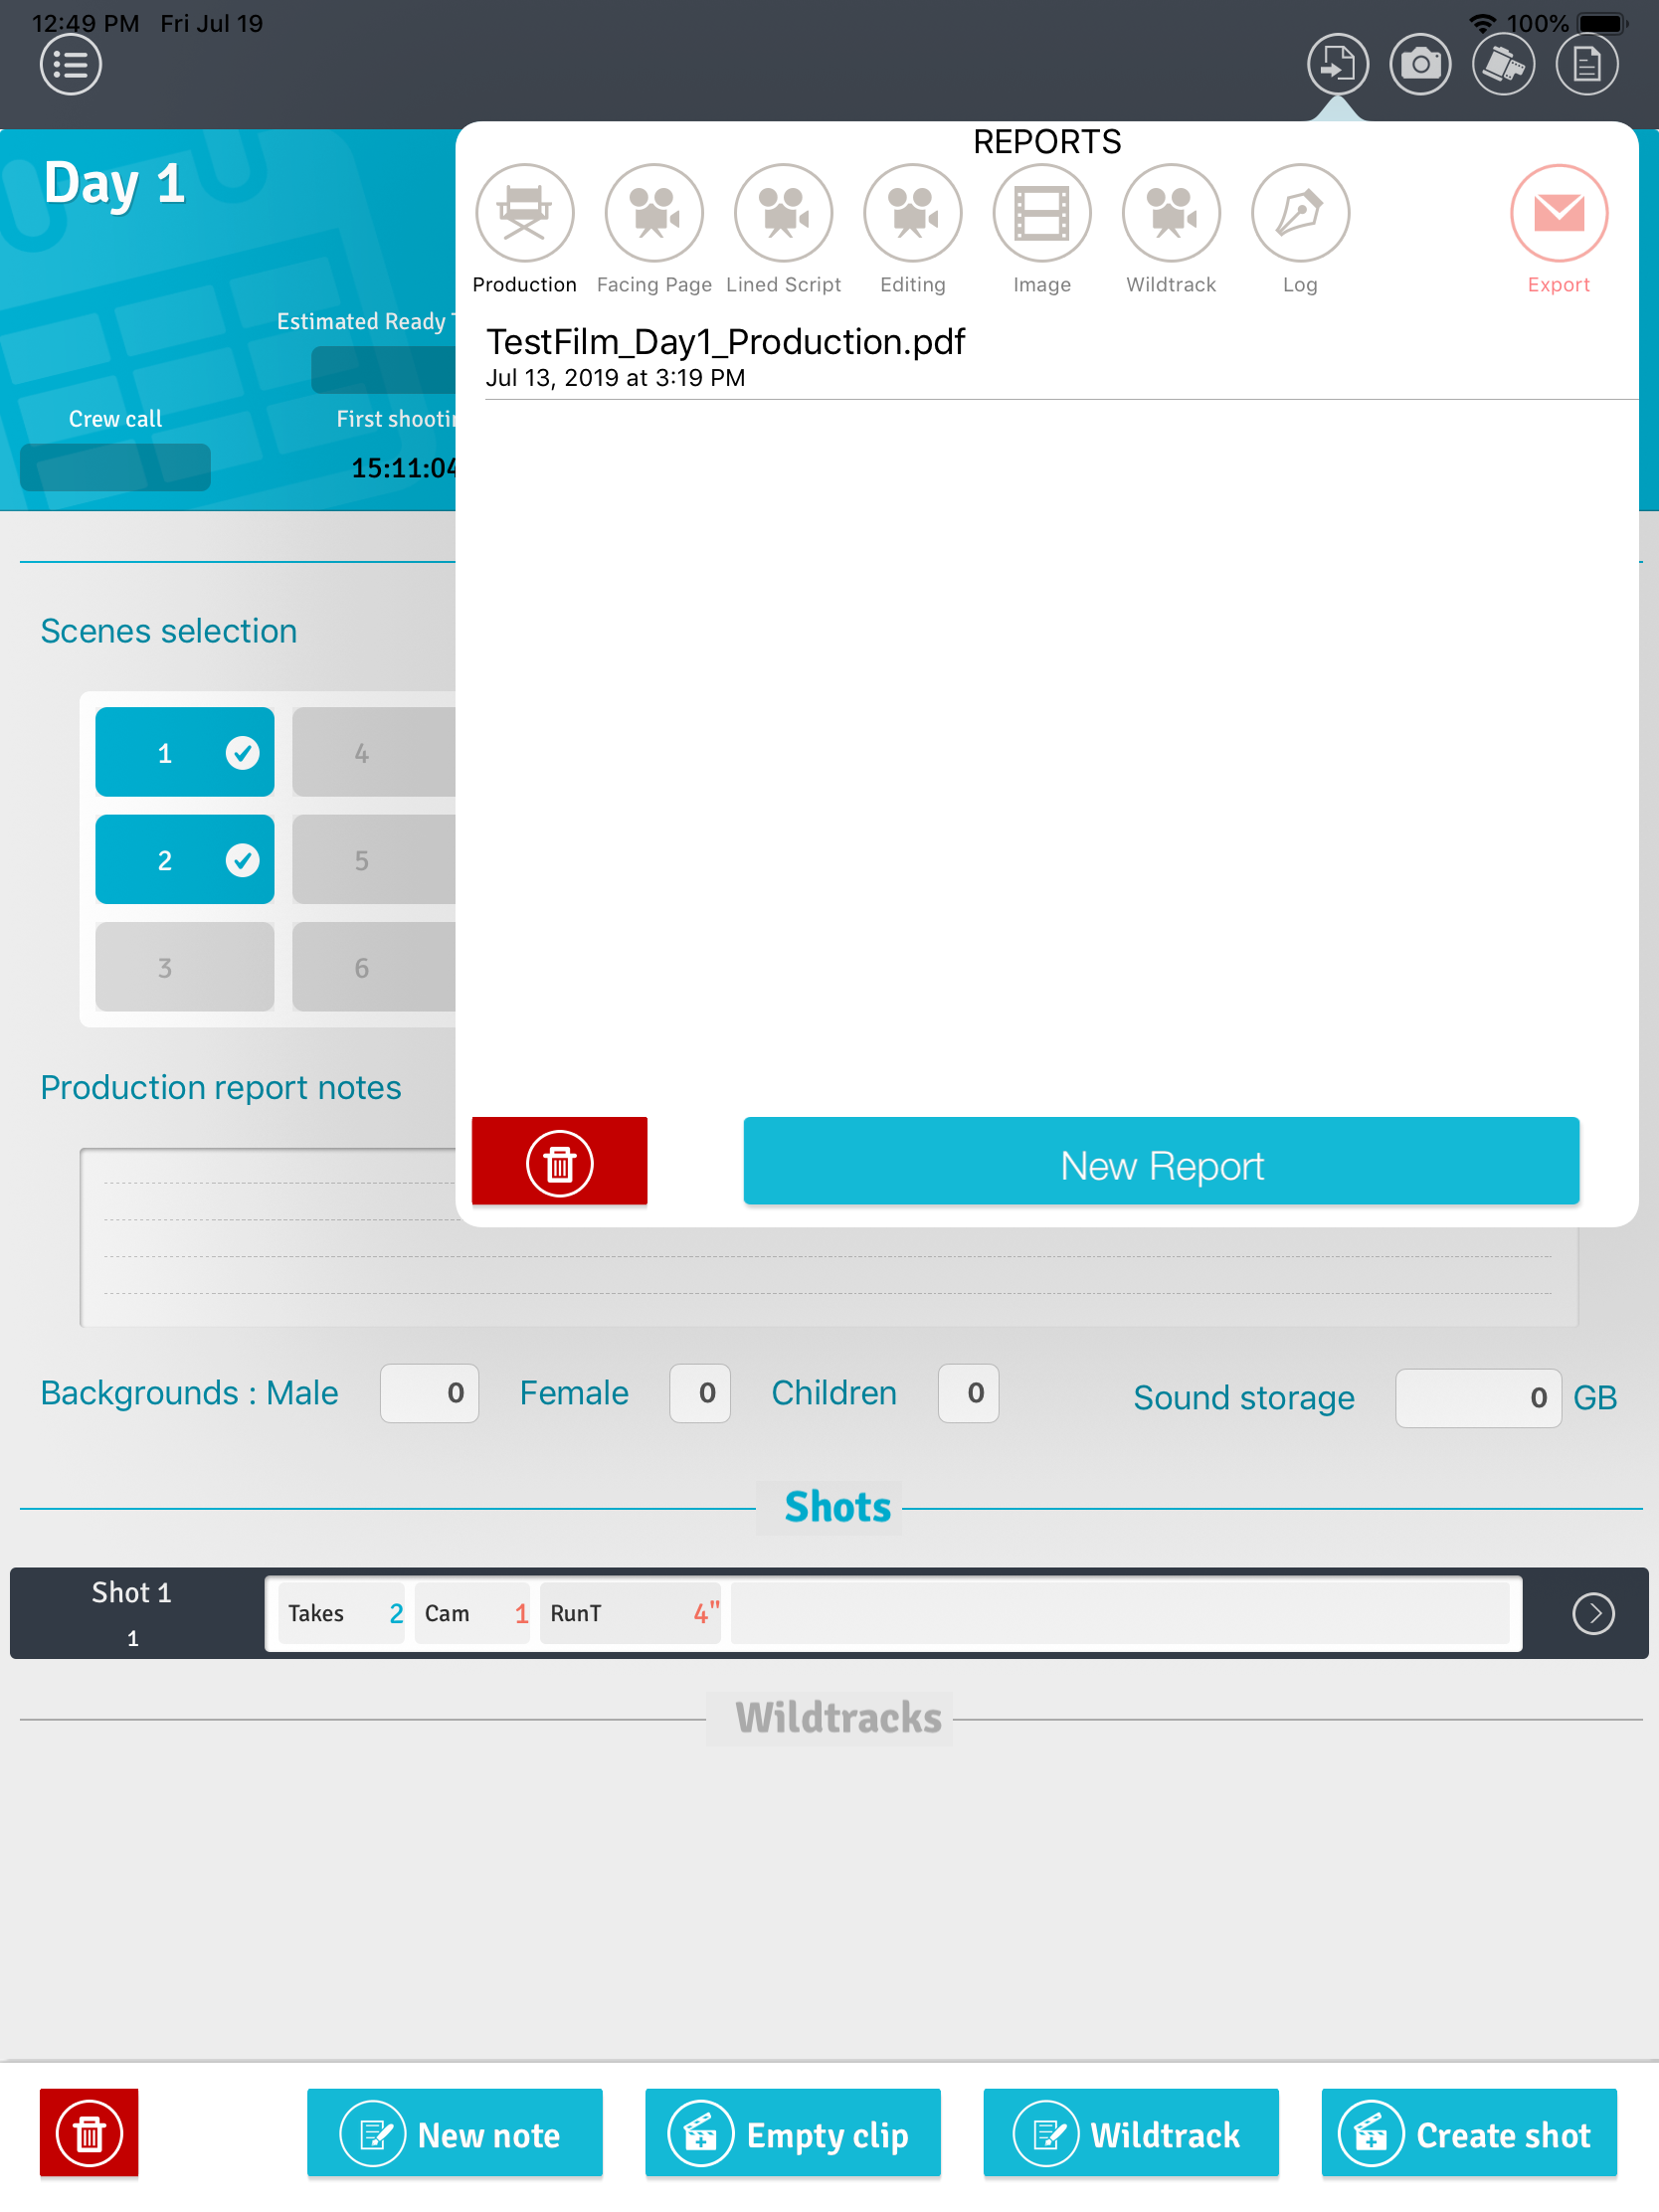
Report module is accessed from the day screen (as well as from the shot screen for editing and lining reports). You can tap on the topmost icons to select the type of reports you want to work on, then either generate or delete them.
Once you’ve generated the reports you want to send, go to the export section (right-most button) and select them in the list. Finaly, tap on the export button. A zip file containing all the pdf files will be generated for you to send via email, or airdrop, or into another application.
Reports are not backed up, because they’re supposed to be easy to regenerate if you need them. It is therefore important that you don’t do temporary modification to the projet just for generating a report (and then undo those changes later). If you feel like you need to do that, chances are you missed an app feature. Contact us on the support to make sure your case can’t be properly handled otherwise.
Script import module
Script Evolution has the ability to import a script in either PDF or Final Draft format and automatically generate (or update) a project with the scenes (and characters in the case of Final Draft document).
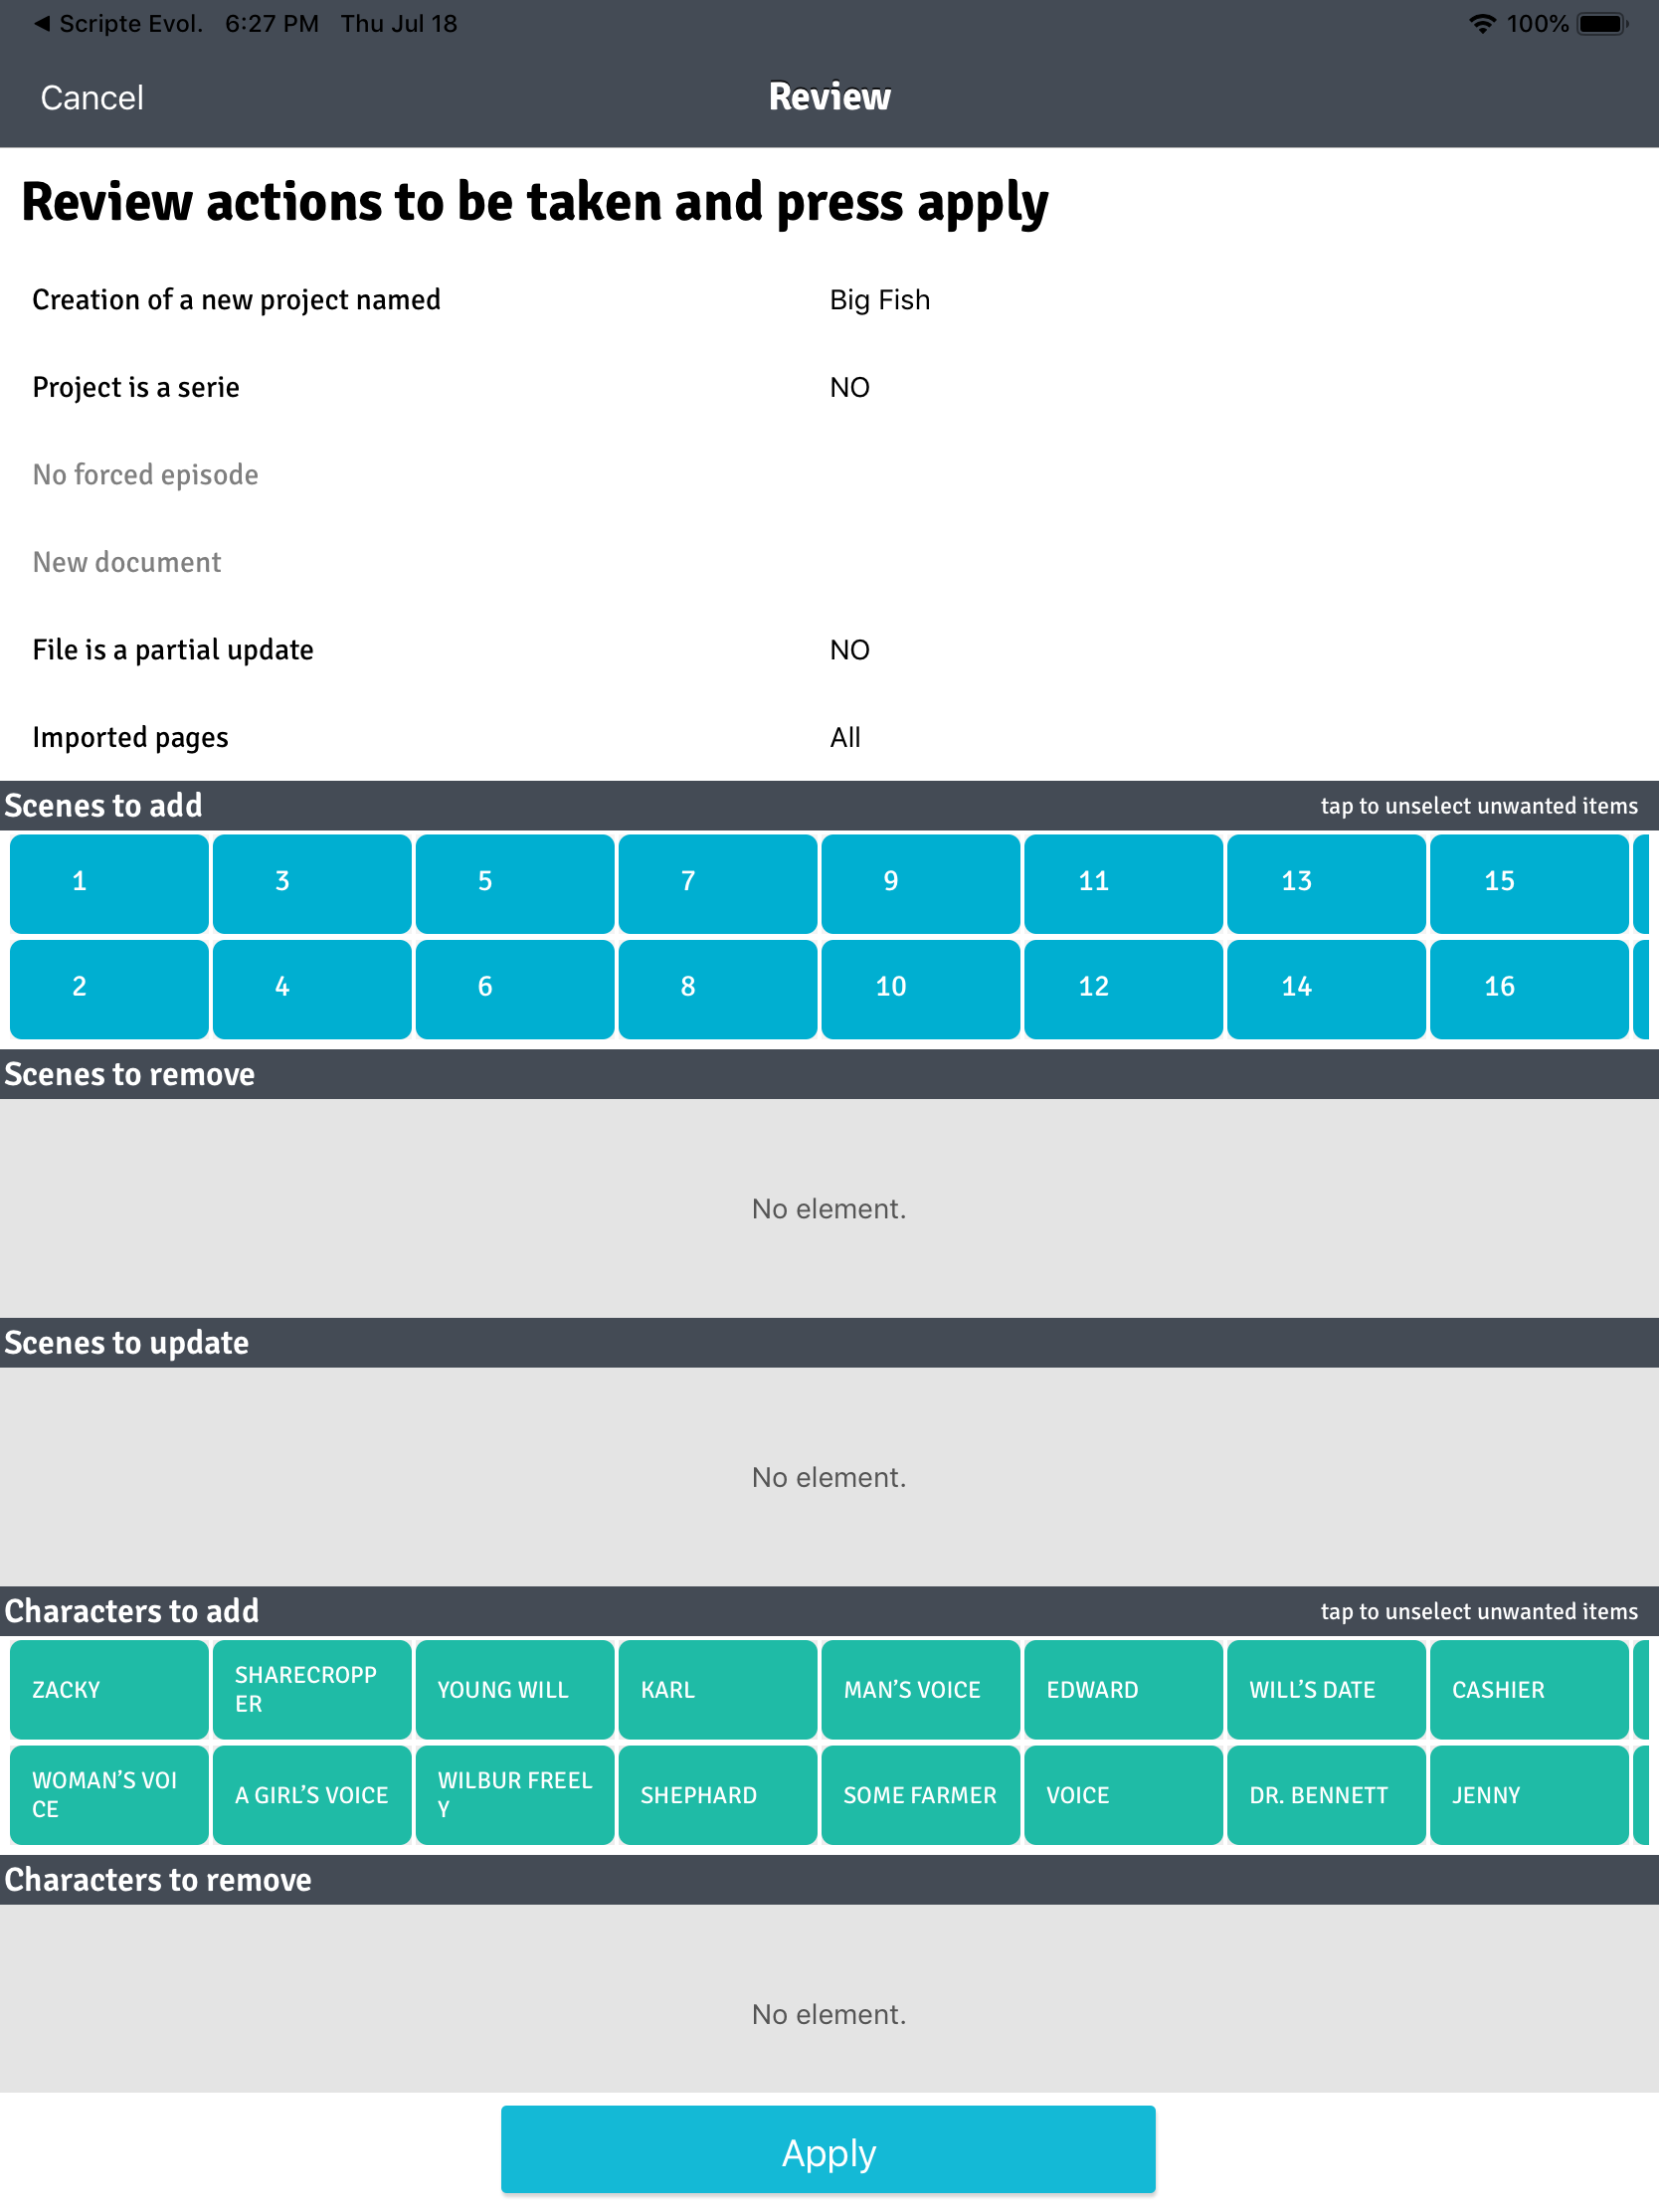
In order to import a script, simply open it with Script Evolution on your iPad (from the mail app, or airdrop, or any other source). You will then be guided through a short wizard to select the options and then reach a final recap screen.
Script Evolution is trying its best to understand the content of the script. However, mistakes are always possible. You can always disable an action by tapping on the character or sequence that you don’t wan’t to add or remove or update. The box will then turn gray to indicate that the element will remain unchanged.
Script import can remove scenes and characters from your project. Make sure you review carefully the actions to be taken before pressing apply. Perform a backup before doing heavy modifications or if you have any doubt.
Although you can visualize the script from the app after you’ve imported it, there are no text editing features inside Script Evolution, on purpose. If you need to perform updates to your PDF or Final Draft script, we encourage you to pick an app from the app store that’s specialized in doing that. Once you’ve edited the file, simply reimport it in Script Evolution and select the script you want to “replace”.
If you’re using an iPad with a large screen, we recommend using the iOS split screen view, with Script Evolution on the left to record times and write notes on takes for the reports, and a script editing app on the right to take other kind of notes such as continuity or reminders.
Script Lining module
Lining module is accessed from the day, shot , take , sequence and character screen, after you’ve imported a script (see above. Opening the script will directly scroll to the most relevant page, depending on the current screen.
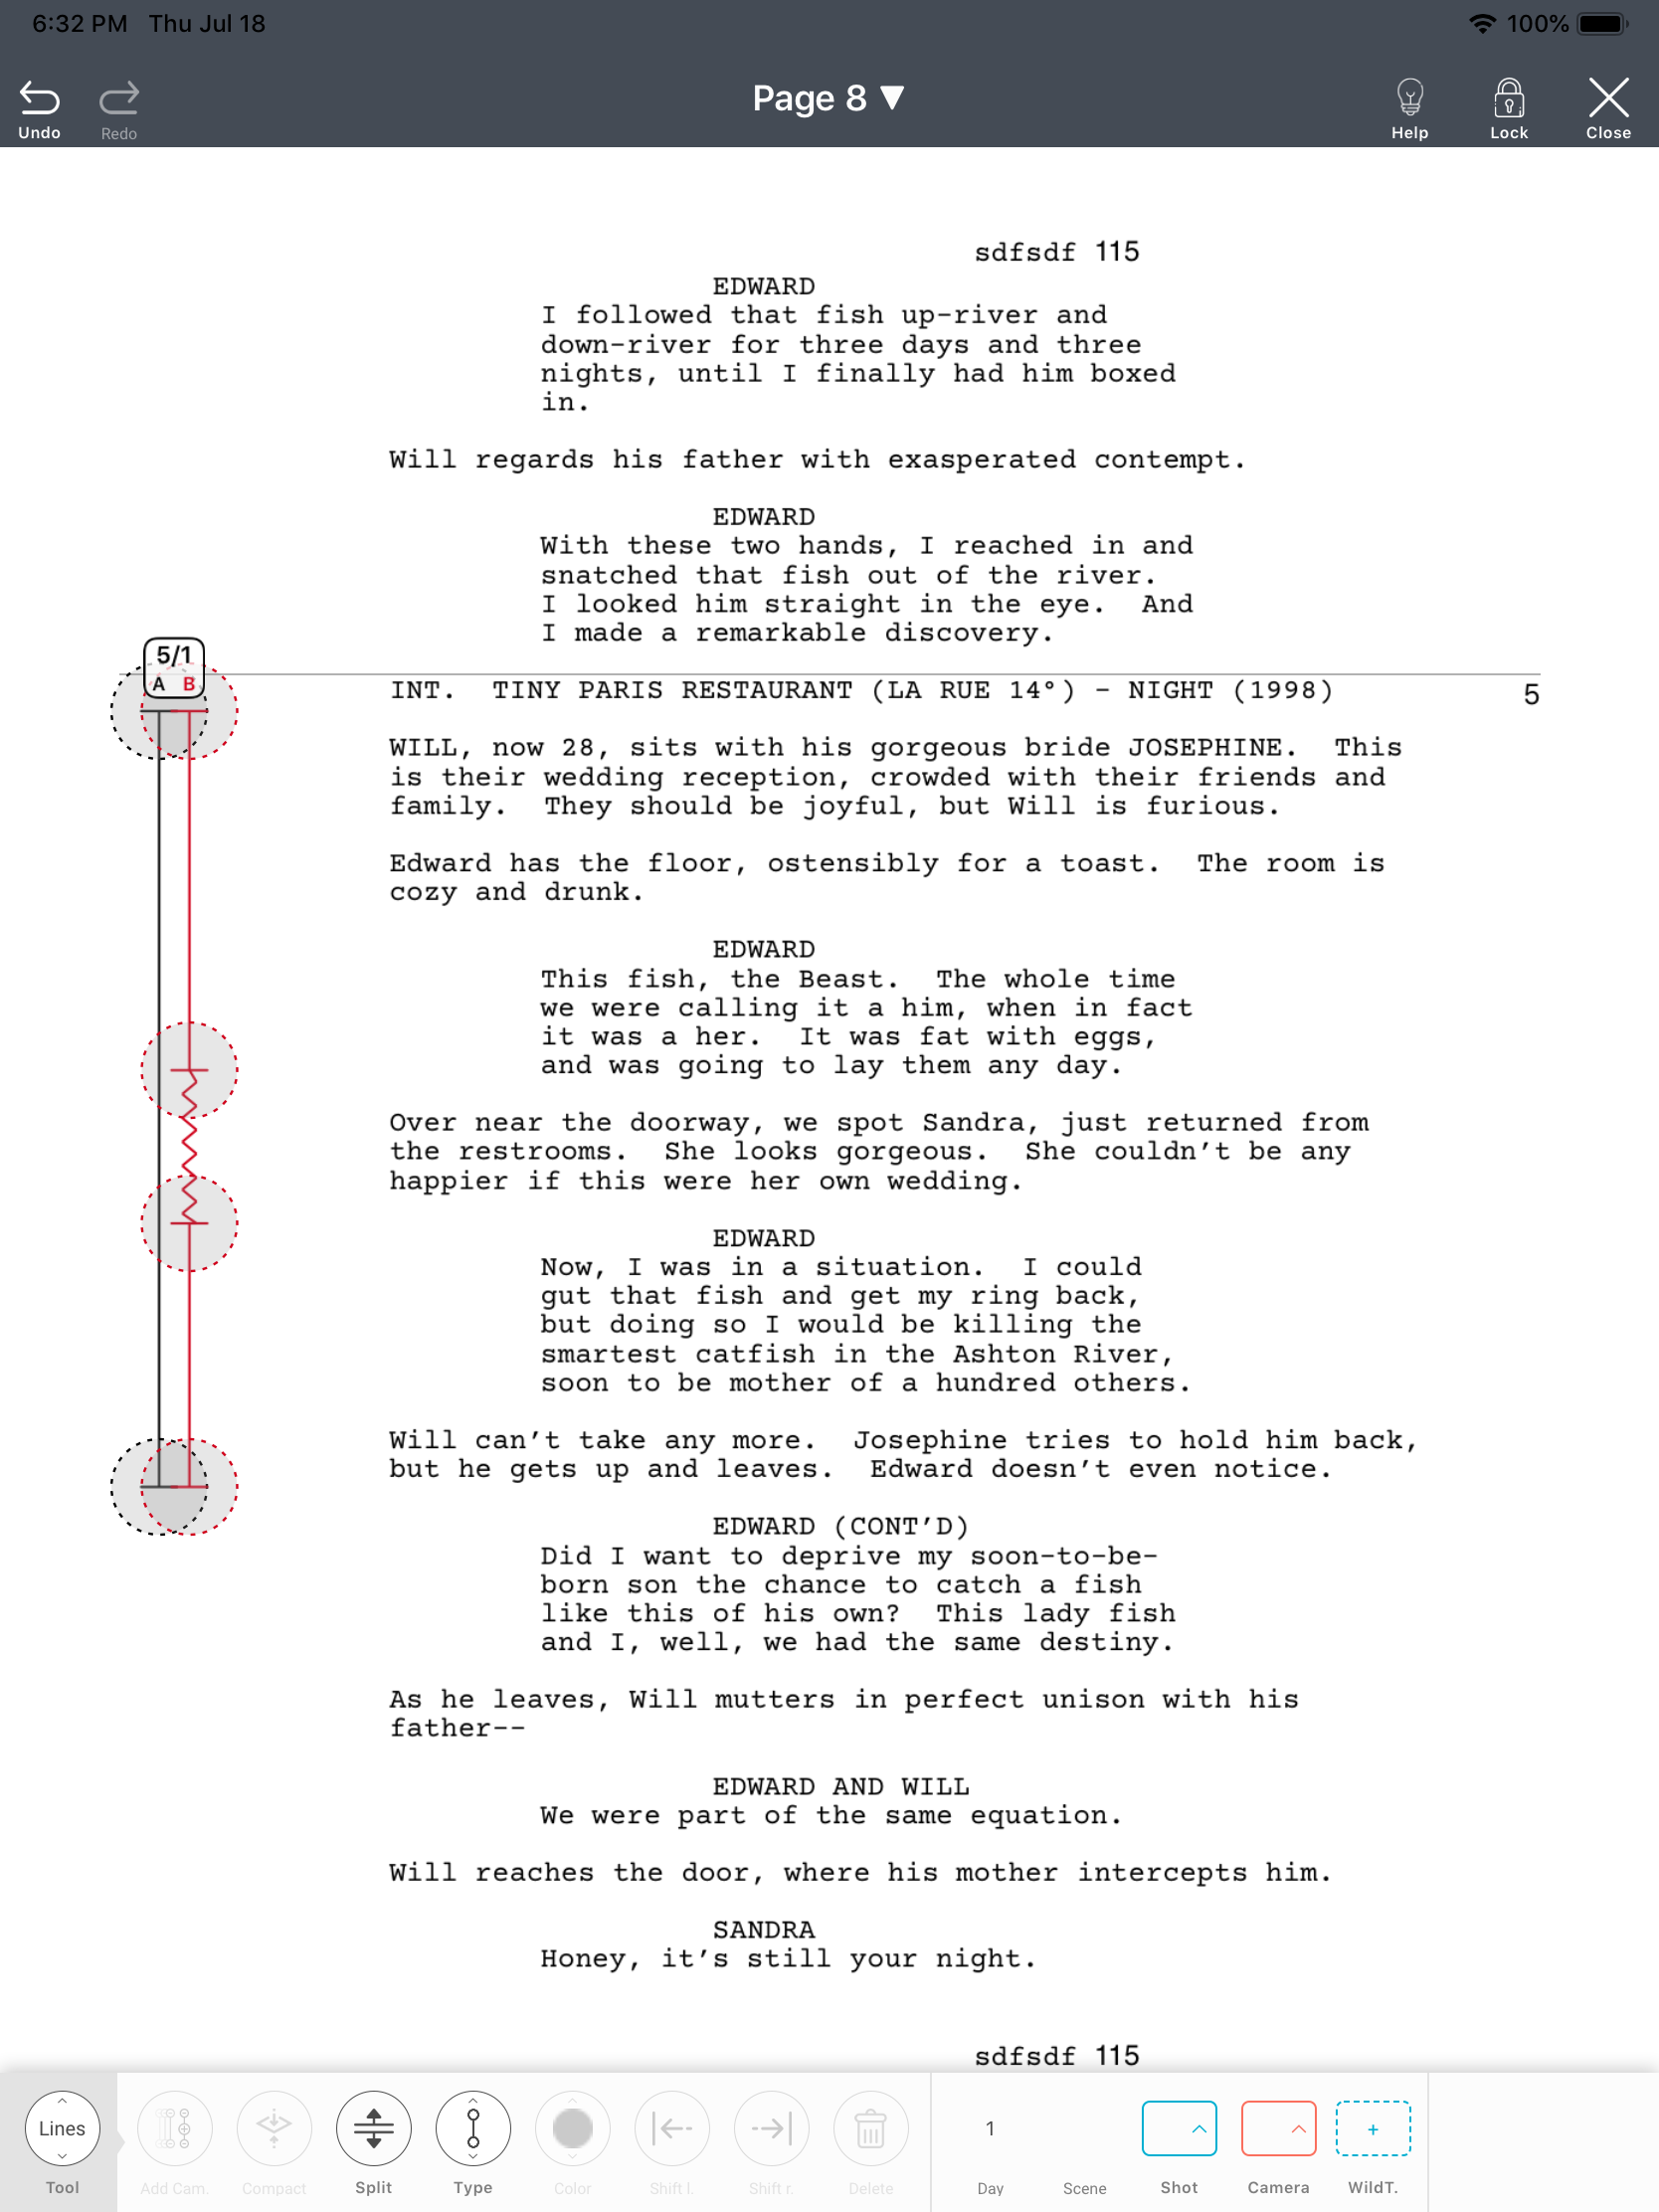
The lining screen consists of three parts:
- Top bar: contains navigation facilities, as well as undo/redo buttons , help and close. The “Lock” button locks the screen in read-only mode.
Content: pages for the script. Tap on the script to start inserting a line, then tap on the script where the line ends. Drag handles to change the line length. A line can be split in segments by pressing the “Split” button and then on the line.
The general selection mechanism is :
- once an element is highlighted, you need to tap over it to deselect it.
- you can’t select another element while a selection is already in progress. For example, you can’t directly select a line if one is already selected. You must first unselect the current one by tapping on it.
Bottom bar: the bottom bar contains the majority of editing tools. It has three sections:
- left-most button : editing tool. Can choose between lines (to create lines), annotations (single mark or arrow) to add take-specific information to a shot, or manual sequence divider, for when the application didn’t manage to properly identify a scene at some part of the script.
- center zone: all tools related to line color, segment type (straight or wriggle), horizontal-positioning, deletion, multiple-cameras lines.
- right zone: linking section. Lets you associate a line to elements of your project (shot, camera, wildtrack). You can also create those elements directly from this menu if you want using the corresponding “+” buttons.
Drawing line workflow
The basic workflow to draw lines with wriggle parts is as follow :
- Tap once where you want the line to start (marking the beginning of the shot). This should create a handle marking the beginning of the line.
- Tap once where you want the line to end (marking the end of the shot). You should now see a line covering the part of the scenario the shot covers.
- Select the “split” tool by tapping once on the button in the bottom bar. The button should remain highlighted.
- Tap on the line at all the places where you want the line type to change. This should add small marks delimiting segments.
- Unselect the “split” tool by tapping once on the button in the bottom bar. The button should be back to “unselected” state.
- Select the line’s segment you wish to change the type of, by tapping once on it (it should be highlighted).
- Select the “line type” button at the bottom and select “wriggle”. The segment should now be using wriggle style.
- Unselect the segment by tapping on it.
You need to have at least one day in your project to be able to add lines (since lines are usually associated with shots, and shots need to exist inside a day).
Associate lines to project’s elements
Once you’ve drawn a line, you need to associate it to a shot and a camera from your project. To do that :
- Select the line by tapping anywhere on it. It should be highlighted.
- Select the shot or camera for the line using the corresponding rectangular colored button in the bottom bar.
- If the shot hasn’t been created yet you can create it by pressing on the “+” button from the list. A form should appear to fill the basic information.
- The rectangle on top of the line should now display the shot and the camera identifier instead of a question mark.
Script Evolution automatically copies and adapt lines from scripts whenever it is replaced by a new version using the import module. If a scene was moved to a different page, the lines will be automatically moved to keep the same position relative to the scene header.
Photo module
Coming soon